Clothing Attribute Painting
发布于:2024-11-21
Clothing Editing Interface Function Introduction
In the garment panel, various attributes related to the garment can be painted:
- Attach Weight: Specifies the attachment weight of the garment.
- Stretch Weight (Coefficient): Defines the stretch weight or coefficient.
- Bending Weight (Coefficient): Sets the bending weight or coefficient.
- Thickness Weight (Coefficient): Determines the thickness weight or coefficient.
- Shrinkage Weight (Coefficient): Indicates the shrinkage rate weight or coefficient.
- Fixed Vertex: Marks the fixed vertices of the garment.
- Field Influence Weight: Applies to the volume axis influence weight.
- InPaint Mask: Areas using the InPainting algorithm for skinning transfer.

I. Weight Painting
Click on the top "Active Brush" to activate the brush tool, and select "BrushData" in the property bar to set the brush.
.png?alt=media&token=d3280967-ad25-4338-890c-e3d47db1937e)
The brush supports painting in both the 3D panel and the 2D panel.
Brush Settings Panel:
.webp?alt=media&token=c4dc503b-e381-4b03-b1fa-ce4e58bebec1)
1.Brush
Parameter | Meaning |
|---|---|
Brush size | Brush size |
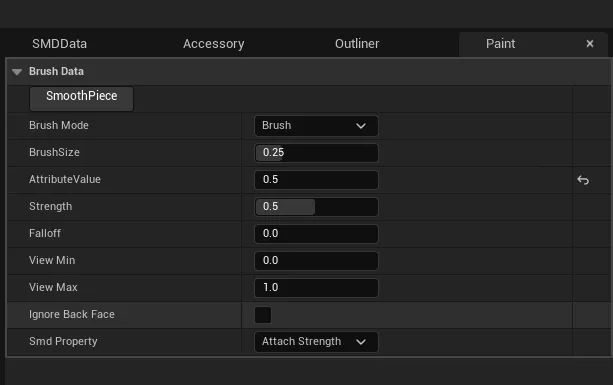
Attribute Value | Brush color value, 0-1, corresponding to weight 0-100% |
Strength | Brush strength, multiplied by the Attribute Value to get the final brush color value |
Falloff | Falloff, gradual decay of the brush from the center to the edge |
Ignore Back Face | Ignore backfaces, when enabled, the brush painting will not affect the patches facing away |
SmoothPiece(Button) | Clicking will smooth the overall color of the selected patches. |
2.Smooth Brush
Parameter | Meaning |
|---|---|
Brush size | Brush size |
Strength | Brush strength, multiplied by the Attribute Value to get the final brush color value |
Ignore Back Face | Ignore backfaces, when enabled, the brush painting will not affect the patches facing away |
SmoothPiece(Button) | Clicking will smooth the overall color of the selected patches. |
3.Gradient Brush
Parameter | Meaning |
|---|---|
Gradient High Value | Maximum gradient range |
Gradient Low Value | Minimum gradient range |
Brush size | Brush size |
Ignore Back Face | Ignore backfaces, when enabled, the brush painting will not affect the patches facing away |
SmoothPiece(Button) | Clicking will smooth the overall color of the selected patches. |
- Direct Drawing (yellow brush area): Maximum gradient range area
- Hold Ctrl while drawing (magenta brush area): Minimum gradient range area
- After drawing, press Enter to generate the gradient effect.
4.Fill
Parameter | Meaning |
|---|---|
Attribute Value | Set fill color |
5.Painting Values Exceeding 1 (V2.4.0)
- Click the Paint toolbar to enter painting mode.

- The pattern piece will display green, indicating that it has not been edited through painting.
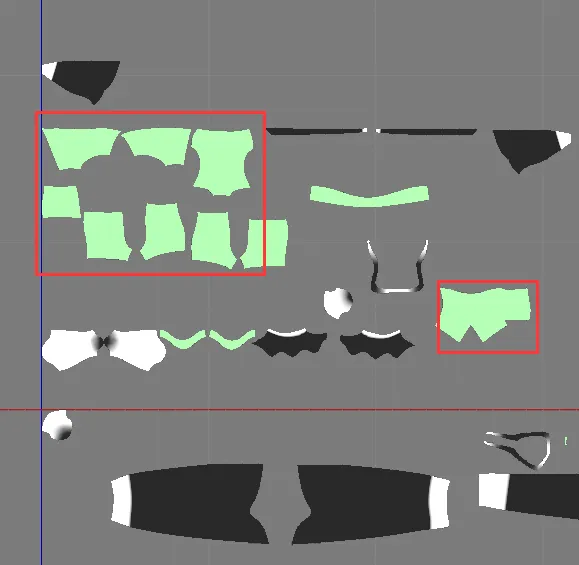
- Brush Properties:
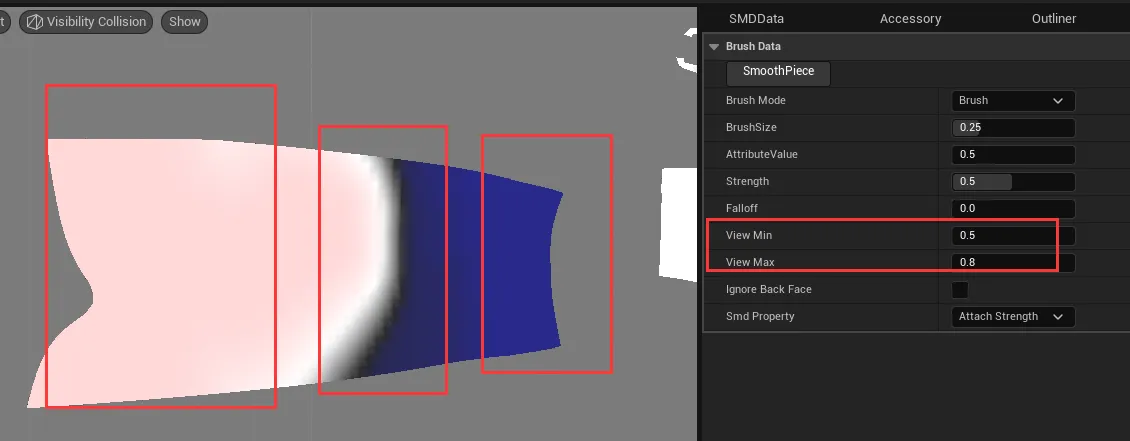
View Min\View Max:Set the display range: values below the range will display in blue, values exceeding the range will display in red.
II. 3D Viewport Shortcut Operations
1.Keyboard Shortcuts
When the brush is activated, keyboard shortcuts can be used in the 3D viewport:
Scene | Shortcut key | Function |
|---|---|---|
Brush Mode & Selection Mode | B | Toggle between mouse brush/selection mode |
Ctrl + Z | Undo (supports up to 4 steps of undo) | |
Brush Mode | Long press B + left mouse button drag left or right. | Adjust brush size |
Shift + left mouse button | Smooth brush | |
Selection Mode | Shift + left-click | Add patches |
Ctrl + left-click | Subtract patches |
2.Right-click Menu
After selecting patches, right-click menu:
.png?alt=media&token=85efbc33-7ee9-4afb-a2e8-b9d8d9411c2d)
- Deselect
- Select patches with the same material
- Select patches with the same collision layer
- Select patches with the same collision group
- Freeze patches
- Enable adhesion to the body
- Hide patches
- Independently select patches
- Show all patches
Right-click menu in the blank area:
.webp?alt=media&token=57131b5f-dbe6-4859-a477-ec07a5859a77)
- Show all patches
- Automatically enable adhesion to the body for all drawn patches.
III. 2D Viewport Operations
.png?alt=media&token=7a287486-fda7-47f3-8bdc-3862bc916829)
When the brush is not activated, and when the brush is activated, press B to switch to selection mode, you can select and move patch positions in the 2D interface.
Dragging with the right mouse button can move the 2D viewport position.
Mouse zooming can zoom in/out the 2D viewport.
ⅣAdding Reference Skeletal Mesh (V2.4.0)
In the Outliner, you can add a skeletal mesh.
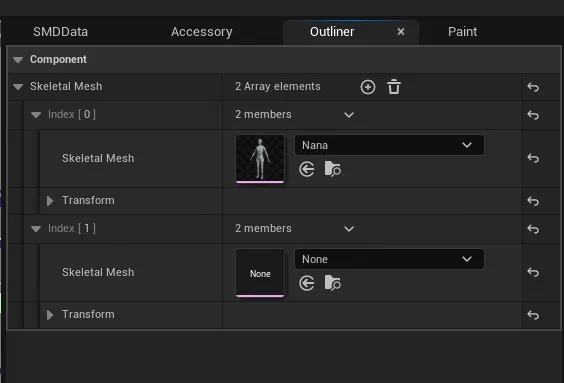
Add skeletal meshes such as human bodies or armor, which can serve as a reference when drawing the Attach range, making the range more precise.
